-->
Showing posts with label Chutney. Show all posts

Tuesday, October 22, 2013

Raspberry Jam

It has been raining here most of the time, making it grey for the time being. But, actually autumn season has turned up showing in with its sure signs of yellowing and falling leaves, and even if it’s raining it still displays out splendid views. Every year this is just like a natural rhythm and cycle, what comes in, must go out as well. And when you walk past the public pathways, it looks absolutely beautiful with falling leaves everywhere, so colorful and vibrant, but here comes rain and it lashes out everything. I would really like to see sun-rays streaming through those beautiful autumn trees, but for that I have to wait some more time I guess. I have also planted some window sill plants – it looks like mint leaves are ready to be used up in cooking, and two garlic pods have also been planted, however I am not sure how they will end up though.


These days mornings are too early for us, as it is completely dark outside, and when I put the kitchen light on, it feels like lighting up a “diya” in complete darkness, first thing that I search out the dip-dip tea –bags in kitchen cupboards to make ginger tea for us. Morning rush-hour becomes hectic there after. But still it has a rhythm of it’s own, cooking and packing lunch-boxes, getting ready to drop dear daughter off to school and we do walk to school everyday, while we get to see many beautiful autumn trees these days and what marvellous views they have.

While we are struggling with patches of rain here, I thought let me add little bit of color to our mundane cooking, so made these raspberry jam- red , vibrant and of course very sweet. And this has been finished up already with in 3-4 days. Actually this is a wish on my daughter’s part to make raspberry jam after I made Red Currant jam last time. And we have been putting up this home-made jam over rotis, paratha and as toppings over biscuits as well, and then of course there is way to use them up over our morning breakfast toast as well.
Sometimes, there is such simplicity of a recipe that there is no need to write instructions for that, but for those who are starting to make home-made jams, this is for you.
Raspberry Jam
Recipe requirements
250 Gms of fresh raspberry
7-10 blackberry
250 Gms of sugar
¼ tsp of lemon juice


Method
Wash and clean raspberry. Pluck out the sad ones.I have used black-berry as well but in very few quantity.
Now put those in saucepan put the heat to medium flame. Sprinkle about a pinch of salt and let it cook well. After about 7-10 mints they will tend to release lots of water.Press them with the help of cooking spatula so that they gets mushy or crushed well.
Now collect them and sieve through well to discard the seeds( since I was working with less quantity , I relied on the tea-strainer, but if you are working with huge quantities, I would suggest to use a good quality strainer ) and collecting all the pulp that is formed. However, if seeds don’t bother you much then proceed to adding sugar now.
Now add in sugar and let it to cook at med-low flame about 15-20 mints. Meanwhile discard any white froth forming from time to time on the top. (Ok, sometimes I tend to make sugar syrup before hand and then add the pureed raspberries, then wait till they gets thickened and mixed up.)
Once it starts to become thick, stop the flame, and then add lemon juice to it, do not cook any further now as lemon juice have been added.Take the saucepan off from the stove-top.Put a thoroughly clean glass jar in pre-heated oven; keep it for 1-2 mints so that the water in that glass jar gets dried up well. This is our quick way of doing sterilization process.
Now pour in the cooked raspberry puree in to the sterilized glass jar. Once it gets cooled,keep in fridge and it stays fresh for 8-10 days if it lasts till then.
Note-
I haven't used pectin as gelling agent for this recipe.

Similarly strawberry jam, apple jam can also be made.

Happy Cooking Friends

Monday, September 30, 2013

Red Currant Jam

As usual I was doing my weekly grocery shopping in a supermarket here, came across a packet of red currants- red delicious edible small rubies. Now, I don’t know what drew my attention towards them- the colour with which it was glowing or the fact it was way cheaper than most of the other berries displayed out there. I picked it up, and then the first thing that came to my mind was making red currant jelly or jam out of it. I came back home then I put the music on at youtube and then started slowly taking out other things from my "haat-bazaar" bag.


After I had put all the vegetables in refrigerator making and creating spaces in between, I put red currants over my window sill( if you have been with me over these couple of years, you do realize that’s the most active part of this blog, I happen to take almost all the pictures for this blog over there).

And I thought they indeed look very pretty, like scattered priceless red rubies. These red rubies were looking so delicious that I couldn’t resist the temptation and popped couple of them in my mouth, but wait, it turns out they are sour, I mean very sour. So, I was right, there is no other way I can imagine eating them, so it is red currant jam for sure. I was skeptical; really don’t know how this will be received by my folks. But it seems so far they have tried to include in every possible way, over breads, with biscuits, over Oreo or with mascarpone cheese, with ice-cream topping and with yogurt shake, milk shake and well I don’t need to tell now that it’s well almost finished.


Then suddenly I realized ok I have to write the recipe here, in case somebody else is having a tempting time in super-markets to try them, to all those don’t fret or shy away, red-currant jelly or jam can really do wonder to your mundane breakfast table, trust me on that or there is always a better way of using it up with masala lamb steaks the more traditional way.

Red Currant Jam
Recipe requirements
250 Gms of red currant
250 Gms of granulated sugar
1 tsp of lemon juice


Method

  1. Wash well red currants in running water. With red currants no need to pluck the stalks, just put all in the simmering pot and soon it will be all mushy and watery.
  2. Now put them in a large pot and let it simmer. Just press gently with spatula so that red currant turns into mushy texture. Leave it for cooking.
  3. After about 10-15 mints when they release water add in sugar and mix well. Let it come to one rolling boil and then put it to simmer. Discard the white froth which will be formed from time to time.
  4. After about 10-15 mints when the red currants have all mixed well with sugar. Turn off the flame. Add in lemon juice and stir. Remove it from the flame.
  5. Sieve through a soft muslin cloth or a cotton towel. This way seeds can be discarded. Collect the juice. You can do this step overnight if you are using more quantities. I generally don’t wait and like to strain out the entire pulp using a tea strainer in several small batches.
  6. Now put small quantities in a strainer and press it forcefully so that you can collect maximum pulp out of it. Discard the residue that is left after wards.
  7. In a large bowl after collecting all the red currant pulp, mix it all well. It still will be warm.
  8. Meanwhile you are collecting the red currant pulp, sterilize a glass jar or wash them very well with soap water and then pop it in oven for 3-4 mints till it gets dry. And don’ forget to take it out.
  9. Now fill in the red currant jam in to the sterilized jar.
  10. Once it gets cooled refrigerate it for best results. Consume within 6-7 days for good results.


Note- Many jam recipes use pectin as a setting agent, I have never used that so can’t tell about it. But when ever I have used lemon juice, it has quite worked for me so far. This is one of those jam recipes one wants to make again, and again and it’s scrumptiously delicious.

Happy Cooking Friends

Monday, April 15, 2013

Kul'er Chatni/ Ber Ki Chutney


Finally I can say some relief from the cold weather and the spring has arrived, as days are getting little bit warmer. Kids are now back to school after a long Easter holidays, and now this momma has some time to divert her attention towards other aspects of her life, and that includes food blogging.


This “chatni” in Bengali or more eloquent way of saying “chutney” in English, is one amalgamation of kul, dates, raisins and dried apricots and is a sweet preparation. However when ever my Ma would make kul’er chatni, it was always with topa kul- the fully ripened ones available easily back home. Now I thought even if the dried ones or the ripened ones, are not available here or may be it is, just that I never got hold of it, that should not stop me from making simple home-made chutney with the fresh kul/ber. After many Google searches, I finally came to conclusion that Kul in Bengali or Ber in Hindi is popularly known as Indian Jujube, or Indian plum, if you know any other name then do please add in comment section.
Uploading two pictures of kul- narkoli kul but the these are not dried or fully ripened ones, still fresh and green.And another normal ones.


And since its poila boishak today- the first day of "Baishak" month according to Bengali calender, it will be appropriate to post a sweet chutney recipe made with these kul or ber. I know things could have been different had I stayed back in India, with sweet gift packs coming from our reliable grocery walah or neighborhood modi khana, but this is what I will try to make today –some payesh and chatani. And for the rest of the things will wait till I fly back to home.

Now to the recipe for Kul’er Chatni
Kul’er chatni-Ber ki Chutney-Sweet Chutney preparation of Indian Jujube/Indian Plum
Recipe requirements
About a big bowl of kul/ber/Indian Jujube/Indian plum
5-6 dates/khejur
½ cup of raisins/sultanas
¼ cup of dried apricots
1 cup of sugar
½ tsp of oil
½ tsp of panch phoron or Black mustard seeds-shorshe
2-3 dry red pepper
Method
De –stone the kul/ber.And cut into small pieces.
Heat up a saucepan, add oil, temper it with panch phoron and dry red pepper.
Then add in kul, dates, raisins and dried apricots.
Add in sugar and about 3-4 tbs of water. Lower the flame and, let it simmer slowly for about 10-15 mints or till all the ingredients turn out mushy. This is kul’er chatni and made in easy way.To spice up little more-add in grounded panch phoron powder at the end. Personally I don't prefer adding panch phoron gurun/powder to home-made chatni,but this should not stop you from doing so.
This chatni is great accompaniment with warm cooked khichuri and beguni…


And wish you all Shubho Nababorsho, Baishaki, Rongali-Bihu,Puthandu and Vishu ….

Poila Boishak er onek Preeti and Shubecha.

Monday, July 30, 2012

Lauki/Dudhi and Bean Sprouts Sambhar,Chettinad Tomato Chutney with Aloo Charchari and Dosa


One thing about Monday that I hate, ok hate is a very strong word, lets say I don’t like is, it comes right after Sunday, my favorite day of the week. But as I have always said weekend go past so quickly and moments are passed just like blinking of an eye, but the euphoria still hangs on our mind .Fighting my Monday blues here I am typing this post. Not sure what made me write this post as there are many other recipes saved in my drafts. This recipe is like a gate-crash recipe well inspired by that Indian girl at the Olympic opening ceremony. And why not it’s the Olympic season that is going on so thought of inspiring me with some extended cooking .Good at least, if extended weekend is a distant dream for the time being, extended cooking is happening here. Some points scored may be. And I wish extended weekend happens soon.

Yesterday we were on a trip to south India. Oh! I mean to say we made south Indian platter for our lunch in comfy of our home. Here comes a surprising element but with a Bengali touch. I mean there was this lauki/ bottle gourd/  bean sprouts Sāmbhar, Chettinad tomato pachadi and dosa on our platter and then there was this Bengali style aloo charchari on one side. What an amalgamation of region,cuisine and flavor, but well worth it.

Now let’s hop on to recipes for this post - (actually it's four of them)


To be honest this is the first time I am using bean sprouts with lentils or dal, and I really find it extremely satisfying. And in future if I make dal I would definitely keep on adding this small pack power house for health benefits.
We all know lauki/ bottle gourd is a frequent in Sāmbhar, so don’t need to add much on that. Now to the recipe -

Lauki/Bottle Gourd Bean Sprouts Sāmbhar
Recipe requirements (Serves 6-7)
 2 cups of toor dal/arhar dal/aror dal (I used the oily toor dal)
About 2-3 cups of chopped lauki/ bottle gourd/bitter gourd pieces
2 – 3 cups of bean sprouts
1 large tomato
2 tbs of tamarind paste/ sauce available in bottles
For seasoning
1 tsp of turmeric powder
2 tsp of red pepper powder
2-4 tsp of madras hot curry powder/ or Everest Sāmbhar powder
Salt as per taste
Pinch of sugar
1 tsp of ghee
For tempering
1 tsp of mustard seeds
3 dry red pepper
1 stalk full of curry patta
pinch of hing(asfoetida)
2 tbs of cooking oil
Method
Wash the lentils/ arhar dal/toor dal  very well in water.
Put the pressure cooker to heat. Now add in washed toor dal. Add about 2 cups of water, enough to submerge the lentils. Let it come to a boil. Discard the white froth that is formed.
Now add in turmeric powder and salt, put the pressure cooker lid on. Let it whistle once, stop cooking. Take it off and then let it cool off. Once the pressure subsides, open the lid.
You have to add little bit of more water- about 2-3 cups of water.
Add in madras hot curry powder or Sāmbhar powder which ever is available. Add in tamarind pulp.
You may use tamarind syrup/sauce also, available in many superstores now in abroad and most probably in India.
Now prepare the tadka/seasoning
Heat up a saucepan, add cooking oil, let it heat up properly, otherwise mustard seeds wont crackle. If the seeds don’t crackle well, it may turn out bitter.Add them now.Add in hing.
Now add in 3-4 dry red pepper, and curry patta.I didn’t had curry patta this time.
Now add in  chopped onions or pearl onion whatever is available. Add in chopped tomato, lauki/ bottle gourd/bottle gourd pieces and bean sprouts. Keep on frying them, add in red pepper powder and adjust salt. After about 6-8 mints of frying. Transfer this tadka to the cooked toor/arhar dal.
If required add in more water depending on the consistency of Sāmbhar you want. If you need a runny/watery or thin one, then add about 3-4 cups of water otherwise  about 2 cups (approx) is essential.
Let it simmer slowly; add in ghee at the end. Serve hot with dosa.

-Bean sprouts add the healthy quotient to Sāmbhar and lauki/ bottle gord is always good for stomach.

I was more inclined towards making a hot and fiery sauce that could go along well with dosa.So zeroed down the famous Chettinad Cuisine, as it's known for it's hot and  spicy food.Chettinad tomato chutney went very well with the dosa and lauki /bean sprouts sambhar.I had bookmarked Sailaja's recipe way back , but just forgot to make.Any it's better be late than to be sorry oh! I forgot completely.A keeper recipe for us for sure.


Chettinad Tomato Pachadi /Chutney
Inspired and Adapted from (Sailu's Recipe)
Recipe Requirements
2 large tomatoes
2 white onions
2 green chilies
½ cup of cashews or peanuts
For tadka/tempering
6-8 very hot dry red pepper (often the small ones are fiery hot)
1 tsp of mustard seeds
2-3 tbs of chana dal
1 tbs of urad dal
Curry patta
1 tbs of cooking oil
Method
Put a small saucepan to heat, add in cooking oil.
Now add in mustard seeds, dry red pepper .Let it crackle a little bit.
Add in slit green chilies. Add in cashews. (I didn’t had peanuts, cashews come in handy in case you have peanut allergy)
Add in chopped tomato and onion.
Fry them very well for 3-4 mints till they turn little translucent.
Let it cool properly. Now pulse through in mixer.And serve garnishing with curry patta and tempered mustard seeds.
If you don't like mustard tempering in the initial stage then do the tempering part after blending tomato, onion, green chilies and lentils in blender.

Bengali Style Aloo Charchari
Before I start writing it, I would say please make your authentic south Indian version of aloo sabzi  or the potato stuffing with dal+ curry pata+mustard seeds tempering if you don’t like Bengali style aloo charchari. However we feel Bengali style aloo-charchari goes very well with dosa.Now that’s Indian fusion food for you.
Recipe requirements ( serves 3-4 )
2-3 white potatoes
3-4 green chilies
For seasoning
½ tsp of turmeric powder
Salt as per taste
1 tsp of kalo jeerey/kalaunji/nigella seeds
1 or 1 and ½ tbs of cooking oil
Method
Peel the skin, keeping some part of skin on.
Now heat up a saucepan, add in cooking oil.
Add in kalo jeerey, green chillies slit in between.
Now add in potatoes.Keep frying for 2-3 mints.
Add in salt and turmeric powder. Keep on frying.
Add in about quarter cup of water, cover it and then cook till potatoes are cooked well.If you wish you may add fresh green peas to it.


Now for the Dosa
Recipe requirements (makes 8-10 dosa)
 1 and half large cup of basmati rice/parboiled rice would be better
½ large cup of urad dal
Pinch of methi seeds
Soak dal and rice with methi seeds overnight.Other day pulse through finely in mixer.
Now keep them in direct sun rays to ferment well.
It would be nice to keep it overnight to ferment in cold weather.But back in India 4-5 hrs in strong day light is enough to ferment it.
Prepare the tava /iron skillet for dosa preparation.
Add in bit of more water and salt to work while you would swirl the dosa batter. You may look into this post for more details-Here.
Make dosa- Swirling and frying on hot tava with a ladle full of the dosa batter. Keep on doing it for other 7-8 dosa.

Enjoy this South – Indian Platter with friends and family.

I will be on a week long break from tomorrow.

Happy Cooking Friends

Thursday, August 18, 2011

Tartar Sauce-spruced with Indian spices


Tartar sauce is a great way to spruce up your tortilla wraps or sandwiches. They are great as dips also.
I have made this sauce with garam masala and red chilly flakes and they do give additional flavor as well.


Tartar sauce- Indanised version my way
Recipe Requirements
1 cup of mayonnaise
¼ cup of olive oil
2 -3 tbs of water
2-3 tsp of dried thyme or parsley or mixed herb
½ cup of finely chopped onions
1 tsp of red chilly flakes
1 tsp of garam masala
1 tsp of lemon juice
Method
Mix all well and refridgerate. Take out after 2-3 hrs and serve with these delicious fish cakes or may use them as dressings for tortilla wraps.

Recipe here for -Fish Shami Kabab

Sending this to Condiment Mela  hosted at Srivall's Cooking for all season.

Happy Cooking Friends

Sunday, July 31, 2011

Paka Amer Ambol/ Mango Sweet Chutney


There are some days I have to cook twice or may be three times a day.It just happens when our cook do not appear or is on leave, but then I mostly forget to take pictures. And then you all know assembling props or some preparations for a picture takes time .It’s just not happening right now, the energy level gets drained as there are other chores to look after too.And add to that the hot weather here. And past two days were very hot days. Temperature stuck on 35 or 36 deg C but feels like 45 deg C.
But these are not excuses to justify my looong absence.And when you are out of action for a while, you tend to give excuses for not showing up there.Hopefully that period has passed for good.

Sometimes all you need is a “me time therapy”. I know that will sound selfish, but this “me time therapy’ helps me to rejuvenate my energy level. This can be anything, going for a short walk around our housing complex or going out to get some fresh vegetables from vegetable market or just watching these pretty, tiny neighbors in our community garden. Do you have your "me time therapy" often ? How do you mean to spend  your "me time therapy".


Well ,life becomes somewhat alluring when you have these pretty looking neighbours.Isnt ?


These are Indian male house sparrows I guess. You can catch them anywhere near your homes, school or office. They have adjusted well to the human invasion into their territories, wonder we as supreme creations of God when will be able to take responsibilities of our actions.


Invasions in any forms are not welcomed, and if they could have their own voices, perhaps,  they would have conveyed it long before to us!!


As for the time being, live and let them live peacefully with whatever we have left with us so far here in earth.

Now to the recipe --

Sunday, September 12, 2010

Lemon Pickle or Nimbu Ka Achaar


Summer season is one particular season, which we were looking forward to this year here. Don’t get me wrong , when I speak of summer, I mean summers in western countries not the one we are habitual of seeing in India.I know it’s harsh and cruel as compared to the mild weather here.I just love the warmth of sun rays coming through our window glass and when it touches you, you feel rejuvenated. One thing which was on my to-do-list was to prepare home-made lemon pickle. I know what you must be thinking when so many good quality pickles are available in supermarkets, why to take pain for a lengthy and long process.

I know, but sometimes a simple thing to do can be very challenging and pickle making is one thing. So, I ventured out to this unknown zone. And over a time I have come up with this recipe to make my home-made lemon pickle. Pictures shared below is my 3rd attempt in making lemon pickle and turn out so good that I thought it’s worth of mentioning here. I don’t count half way efforts and when it can satisfy my level of expectations then only I go ahead and talk about it here. If you are just trying it out first time and things don’t go the way you have expected, don’t loose your heart there is always a second time.If I can do it so can you.Give it a try sometime.

I was always so intrigued by my Hindi speaking friends.And their delicious Tiffin box for which they used to have at least one type of achaar daily with a sabzi and paratha .Be it nimbu ka achaar or aam ka achaar or karounde ka achaar and so on…
I know if they happen to taste this perhaps they would have told me-“No we don’t add curry patta to our nimbu ka achaar.”
Then I would have gone on to say-“But this is how one of my south Indian friends makes it.”
So, perhaps they would have gone on to tell me this is not authentic, traditional nimbu ka achaar.
Isn’t it great how a simple nimbu ka achaar can be made in two different, sorry three or may be four different ways? Such is the diversity of our Indian cuisine for that matter our culture.

I liked the flavor of this achaar, spicy, tangy and it goes well with my dal and moong dal’er bhaat.
Now am I giving doubts to my Bengali friends-“eyi bhabhe bhaat, moong dal er sathe lebur achaar keo khaye naki, horrible!! Begun bhaja, aloo bhaja nahole potol bhaja khaye, keo Hindustani’r moton lebur achaar khaye naki.” But we do like eating with a fresh cut slice of lemon, isn’t?


Adapted from This Recipe, I do think I have improvised it a lot to suit our taste buds.
You can almost double,  may be triple the content for a full jar of lemon pickle. For 3 persons, I do think below measurements serve well.

Lemon pickle
Recipe requirements
4 -6 lemons
2 lemons for lemon juice
2-4 garlic (if you wish to add)
3-4 green chilies (if you wish to add)
Salt as per taste –I added about less than ¼ cup of salt.
Less than ¼ cup of sugar (if you wish to add, but not necessary)
½ tsp of methi powder/ grounded fenugreek
¼ cup of paprika
3-4 tbs of oil to add later
1 tsp of turmeric powder
For tempering
1 tsp of hing
2-3 tsp of mustard seeds
1 tsp of cumin seeds
4-5 small dry red pepper
About 20 curry patta or 4-5 twigs of curry patta
2-3 tbs of cooking oil/sunflower oil


Method
Chop and cut 6 lemons into small cubes. Make sure to get rid off any seeds if any. Wash them in running water.
Now most important dry them very well before you start making pickle. Traces of water can spoil the pickle. Fungus may grow due to the moisture that is being trapped inside.
On a kitchen towel or you may use strong quality tissue paper to dry them up. Scatter all over; make sure they do not overlap. It may take up to 5-6 hrs if exposed to proper and continuous sunlight. Summers are best time for pickling specially after Holi.I made this batch in the month of June and it’s almost September ready to be eaten.
Now squeeze out juice from 2 lemons and keep them aside. Make sure to get rid off any seeds.
In a big mixing bowl, mix in cut lemon cubes, lemon juice, salt, sugar, cooking oil, paprika, fenugreek powder, chopped garlic and green chilies.

Prepare the tempering
Heat up a saucepan, add oil.
Temper it with hing/asfoetida, cumin seeds,dry red pepper and mustard seeds and curry patta.
Let it cool completely.If you wish you may go ahead and mix it well with the prepared pickle.
Otherwise wait for 3-4 days and then temper it.Meanwhile keep the lid closed and place the jar in direct contact of sunlight or at least 3-4 hrs daily sunshine.In India 1-2 hrs of sun exposure is sufficient.
It’s entirely up to you to add this tempering, if you do not wish you can skip it. Somehow I feel this adds up to the flavor of ripened pickle.
Store in a clean glass bottle which has tight lid.TIP- I happened to have a pasta jar which I cleaned it well with warm soap water and then sun dry it for 2 days.I used this jar for storing pickles. I have seen one of my UPean friends home, people use ceramic vessels called as “burni” and they cover it with a clean muslin or thick cotton cloth.
Transfer the mixed pickle to ripe and add rest of the oil and close the lid tightly.
Place it where you can get plenty of direct sunlight. It will take approx 2 months for proper ripening.
Meanwhile you may just shake the content and if you wish with a clean dry spoon (wipe dry with a cotton cloth), you may shuffle the content inside once in a while.

Note-
You should choose good fresh lemons without any bruises on skin.
Do not hurry up, initial few days it will turn out very sour. I thought it’s better to add some sugar to overcome the sourness of lemons. But if you do like very sour and spicy pickle you can avoid adding sugar and add little bit of red pepper powder to enhance the spice content.
I happened to add some garlic and green chilies also. But it turn out the garlic's were not soft, any reasons for that.
Be careful about methi/fenugreek. Too much fenugreek can actually turn the pickle bitter.
When I was making this, I was short of hing/asafoetida, but still this has turned out nice. So, if you wish you may skip hing.But asafoetida has remarkable medicinal value. It helps to reduce stomach related disorders and is great for digestion purpose.If you think, you should include it.

There is a No-oil lemon pickle recipe  at  Manisha's Indian Food Rocks. I have made that also, and it tastes delicious too.
And here at VKN's My Dhaba  also.

Then here at Mona'a Zaiqa  also.

Thanks for visiting Spice and Curry

Thursday, November 19, 2009

Whole Wheat Burger


I have talked about a burger recipe on my last post about Bread making.So ,here is the most simple recipe to prepare a Veggie Burger.If you are keen on putting variations to the filling of burger, then you may consider these for a wonderful patties/cutlet recipes.

-- Keema Kabab
-- Vegetable Cutlet
-- Fish Chops
-- Fish Fritters
Now to the most simple recipe

Whole Wheat Burger
Whole wheat burger- for recipe visit here--- Bread Recipe
Some shredded cheddar cheese or any other cheese.
Thinly sliced vegetables of your choice
I used yellow bell peper and tomatoes
Coriander chutney for the dressing
How to assemble
Just spread coriander chutney over the burgers.
Sprinkle some cheddar cheese and lay some vegetables of choice and enjoy the burger.

serve and enjoy.

Link of the week ---

An Indian Summer (http://anindiansummer-design.blogspot.com/ )by Bhavna Bhatnagar, is a great place to know more about interior designing.The blog features pictures of stunning and gorgeous interiors and is all about home decor that covers everything from furnitures to designs and lots more.Do visit to know more about it.

Happy Cooking Friends

Thursday, April 2, 2009

Kid's Lunch-Box -II- Home -Made Mixed Fruit Jam

I have always wished to make jams at home while growing up. I would ask so many questions to my maa while she would be making it for us in kitchen.She in return, would say you wait for some more time and you will know how it gives a sense of achievement when you prepare something and your kid’s finish it up quickly.
I now understand it gives immense satisfaction to see one’s kid gobbling up the home-made jam.
Here is a very simple recipe to make jams at home.Mixed Fruit jam is a good option when giving to your toddlers.


During this season when mangoes and apples are available in plenty, one can easily make mixed fruit jam at home.
Another thing is that I always make jams at night (I have seen my mom making it even in night) give them some to set and then scoop in glass jars to refrigerate them .Its always better to use and eat home-made ones than the store brought as its devoid of all types of chemicals ,colouring agents etc..
Some recipes call for pectin a solidifying/gelling agent Iguess, but I have never seen my Maa or Mil using it for that matter .Some day will share you my Mil’s Guava Jelly recipe also.

Home made mixed Fruit Jam
Ingredients
1 mango
2 chicko
1 apple
Half lemon, extract the juice from it
Sugar at least 1 cup or as per taste
Wash the fruits and then pressure cook them with just 1cup of water.
Take out and peel the skin and take out the pulp
Mix in with sugar and whisk in with the pulp and juice.
Now over a med low flame cook the above stirring continuosly, after one strong boil
Add the lemon juice, stir and cook till it reduces and becomes thick.
Tip- you may drop some over a separate plate, look if it’s not runny and if it can stick on the plate, the Jam is ready.
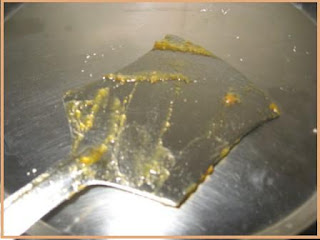
Spatula at rest and the Jam .......


Let it cool and scoop in a sterilized bottle.


Store in refrigerator, stays fresh for 2-3 weeks.
The above amount of fruit made approx one bottle approx 200 gm, increse the content for more Jam.

Its's always beter to prepare Jam in home , as it doesn't have chemicals or coloring agents.
Good as a spread over whole wheat bread and rotis or parathas. Spread a spoon of jam over the toasted bread and yeah you are ready with your’s kid- lunch box.


Happy Cooking Friends

Thursday, December 25, 2008

Dates Tomato Chutney and Happy Christmas


Let me first wish everybody a happy Christmas .May God Bless everybody and let there be peace and prosperity in earth.
Well we were busy decorating our small Christmas tree.My little one was more than happy to help me out decorating the tree.Her little wish was fulfilled by Santa this year .When she woke up it was a cute, lovely doll that was waiting for her. Her granparents were the real Santa this time!!

Now to the recipe, this is tomato chutney, made with dates, raisins and mango candies, called aamsatto in Bengali.
Bengali’s love this tomatorer Chutney and it stays fresh for 3-4 days and even taste better the other day.


Dates Raisin Tomato Chutney
Ingredients
3-4 tomatooes chopped


1 cup of dates ,seeds should be taken out for better.
½ cup of raisins, and Aamsatto
½ cup of sugar or as per taste
Some water

Method
In a large pan/kadhai, add chopped tomatoes, dates and raisins(Kish-mish)
Add in sugar+ some water+aamsatto
Now lower the flame and cover
Cook for 7-10 mints at low

Take out and let it cool.
Store in refrigerator, stays fresh for 3-4 days.


Wish Everybody a Very Happy Christmas .Let there be peace and prosperity on earth.
Happy cooking friends

updated

Mango candie or mango leather is a dried and sweetened mango pulp.
Generally the pulp is taken out after peeling the skin,pureed and it’s sweetened either by jaggery or cane sugar, and then its smeared on a gresed plate .This is then sun-dried for 6-8 days depending on the availability of sunlight.
On the other hand, its possible to make it in a conventional oven just like some people make sun-dried tomato, or roasting of vegetables .One thing that should be kept in mind is the temperature and duration of drying .Its always good to make it at low temperatures kind of very slow process.
Or any fruit pectin can be used for making mango candie also.

This chutney is most flavorful if made with sundried mango leather or aamsotto.I am sure mango leather is available in Indian Grocery Stores as aam papri .

Happy Cooking Friends

Friday, September 12, 2008

Pineapple Chutney and Panch Mishori Dal(Five lentil Dal)

The festive time of the year, with Durga Puja round the corner, Everything is soaked in the spirit of festivity .
The Parar (Street) Thakurer Pandal have been put up, at least the Frame work has been going on full swing. People patiently joining long bamboos, woods and clothes , nailing them and then putting the frame , on which the décor will be made , some good wooden works and many more interesting things .


Pandal is the home (abode) for Goddess Durga for those important four days of shashti right after Bodhon to saptomi, ashtami and navami till VisarJan(immersion of Goddess in Ganges) .

These pandals are pre –planned and well coordinated to give them huge shape or even made into replica of world famous monuments , buildings or even incidents .Each Puja Pandal is based on some theme also and is a pure delight for artists and common people as well .These are such sheer passion and creativity personified .


There is a small village Dinajpur where people are making and carving patterns on the lengths of bamboo and over 1000 such designs are required for a Puja Pandal in Kolkata .
And then Some of them making bird nest like the tailor Birds do, That is going to be used for the décor of a puja pandal .Now that’s the epitome of creativity.
If you pass any street, road, you will come across at least five puja pandal. Under different youth organization often called here as Clubs like chaltabagan jovok sangha or a Balak vrinda sangha .


We see the fully made , lighted puja pandals , but we literally never realize that it required so many hands to join them and put the gorgeous large Puja Pandal come alive.
People are now going for the last minute shopping .Visit New market , College street and there is just mad rush every where .Even Local TV Channels are showing the reverse countdown with each passing days .All geared up and ready to welcome Maa Durga with all the much fanfare and gaiety.
Festivity brings many fond memories also, that include pandal hopping and gorging street foods.While we would be dressed in crisp new clothes and trendy shoes and then the entire schedule would be planned to visit most happening Puja pandals .We would often end up discussing which puja pandal appealed to us most , sometimes even ending up on a sweet little fight .Those were so lovely days , days to enjoy and cherish .

This year also we all are looking forward to the much awaited festival of shakti puja , the victory of goodness over evil , victory of light over darkness .

Jago Jago Jago Maa

Jago Jago Tumi Jago

Jago Durga Jago dasha Praharono Dharini

Abhaya Shakti Bhalo Prayadayani tumi Jago
Jago Tumi Jago .......................

These are Part of lyrics of a devotional Song that is included in MahishashurMardini .

Let’s invoke Goddess Durga to bestow us her blessings and Show the right path that leads us to peace and Tranquility.

Now to the Recipes........

Annaroser Chutney/Pineapple Chutney


Ingredients
Pineapple 10 15 pieces
1 tsp of mustard seeds
1dry red pepper
2bay leaf
¾ cup of sugar ( add as per your taste)
pinch of salt
1 tbs of mustard oil


Method
temper hot mustard oil with mustard seeds , dry red pepper , bay leaf add pineapple pieces , sauté for 1 mints and add salt and sugar , ½ cup of water , cover and cook at low for 10 mints or till the pineapples are cooked .Taste before you serve .


Panch Mishori Dal/Panch ratan Dal ( Five Jewel Dal)


Lentils are good source of protein and provide essential nourishment.
Here is a simple recipe for panch mishori dal (five lentil stew ), that’s often being made in our house , but never occurred to my senses to post about it .Five Jewel lentil stew is a combination of urad , masoor, arhar/toor ,moong and chana dal and which is tempered with cumin seeds ,ginger paste and green chilly .Sometimes chopped onions are also added , but we generally don’t add onions to it .


Panch Mishori Dal/Panch Mel dal /Panch Ratan Dal
Ingredients

¼ cup arhar dal /pigeon peas
¼ cup moong Dal/split greem moong
¼ cup chana dal/split Bengal dal
¼ cup Urad dal
¼ cup masoor dal

Tempering and Flavoring
1tsp of cumin seeds
2 bay leaf
1tsp of turmeric powder
1 ½ tsp of red pepper powder
2-3 green chilly slit in between
2 tsp of ginger paste
1 tomato chopped
½ tsp of aamchur powder (optional)
Method
Clean the lentils and then wash thoroughly in water 2-3 times .
Transfer the entire lentil mixture in Pressure cooker and add 2 -3 cup of water let it cook for 2 mints at high , discard the white froth that gets formed .
Now add little bit of more water , enough to submerge the lentils .
Add turmeric powder and salt, cover the pressure cooker , one whistle at high and lower the flame , let the lentils cook for 7-10 mints at low .
Let the pressure subside and then open the cover, check if water is required, if so add a little warm water . Add the aamchur powder ,if you dont feel like, skip it .


Flavoring and tempering the Ghee
Meanwhile heat up a kadai , add ghee , add cumin seeds , bay leaf , fry for some time .
Add ginger paste, chopped tomato and green chilies , fry them for 2-3 mints .
Transfer the masala /tadka to the cooked gravy and cook at low for 2mints.
Serve with warm cooked rice.
Happy Cooking Friends

Saturday, August 9, 2008

Food Events -Four-In-One

This post is going to be long and with 4 recipes at one go.Three wonderful Food Events and I must join the fun , so thought of posting it at one go, Hope you readers like it.Enjoy and have fun.


Penne pasta with stir fry cabbage For AWED-Italian AT DK'S CULINARY BAZAAR


Penne pasta with stir fry cabbage
I was quite surprised to find good quality pasta here from Big Bazaar in Kolkata , so tried making penne pasta at home , probably after a long time .This turn out to a great meal fro dinner .I had some chopped cabbage , so added those to the stir fry , next time I am going to add more vegetables .One interesting ingredient that is included in this recipe is Maggi taste-maker and it really helped to enhance the flavor .


Here is how we made it
Serves for 2-3 people
Ingredients
Quarter packet penne pasta (Golfera brand available in C3 in city centre and in Big Bazaar in Kolkata )
1 ½ cup chopped cabbage
2 onions chopped
2 garlic chopped
1 Packet maggi tastemaker
2-3 tbs of maggi hot and sweet sauce or any other tomato based sauce
1 ½ tsp of red pepper powder
1 tsp of salt
2-3 tbs of refined oil.


Method
Cook penne pasta accoriding to package direction, set aside in a bowl.
Meanwhile heat up the pan , add oil , add garlic , onion , add red pepper powder, maggi taste maker , tomato based sauce sauté at high , now add chopped cabbage , sauté at high for 4 mints .
Add the cooked penne pasta and mix in well .Take out in a serving plate and enjoy eating it .

Cold Pasta mango Pomegranate salad For AWED-Italian
Ingredients
Pasta quarter packet, cooked according to package directions
1 mango deseeded and chopped
1 Pomegranate , peeled and the seeds taken out
¼ cup of Pine Nuts (optional, If you don’t have pine nuts, you can add blanched almonds or Bengal gram or some cashews also)
¼ cup heavy cream (I have added the fresh home-made Malai also, taste doesn’t differ much)
1 cup of yogurt
1 tbs of sugar
Method
Cook pasta , it may be Penne , or Bowtie or small macaroni .This time I have used Bowtie .
Now Fold in (Mix in) gently sugar, cream and yogurt .You can add little bit of salt also.
Add mango , pomegranate and pine nuts or cashews .
Now refrigerate for 2 hrs prior to serving .Enjoy with Dinner as side-dish .I must tell you , these are very Fulfilling , you can try the above with some Vegetables that are already cooked , like Zucchini, cauliflower and peas to it ,this will turn out to one hearty meal .
Both of these are going to AWED-Italian at DK's Culinary Bazaar , check out her lovely site for more details on AWED series .


~~~~~~~~~~~~~~~~~~~~~~~~~~~~~~~~~~~~~~~~~~~~~~~~~~~~~~~~~~~~~~~


Pomphereter Kalia For Eating with Season At Maninas- FOOD MATTERS


Kalia , don’t get confused with the film Kalia starring Amitabh Bachchan .This is nothing to do with film, except that both of the things very Masaledar , Hindi Film and this Fish Curry .
This is a Bengali Fish Curry , made with onion, ginger and garlic paste , all fresh and no frozen paste is used, we got the fish from fish market , and this fish is a saline water fish and it tastes great , plus point is that you don’t have to dig out small bones or Kanta in Bengali .
Serves for 4


Pomphereter Kalia

Ingredients
Pompheret Fish 4
2 medium size onions
1 inch ginger
5 cloves of garlic
Make a smooth paste of the above ingredients in a mixer
Tempering and Flavoring
1tsp of cumin seeds
1 tsp of salt
½ tsp of sugar
1tsp of turmeric powder
1 tsp of red pepper powder
1tsp of coriander powder
1tomato chopped
Method
Clean the fish , marinate the fish with turmeric powder , salt .set aside .
Heat up a heavy bottom pan, add mustard oil, fry the fish till crisp .You can have this fried fish , go ahead and you will enjoy this mach bhaja , it will taste heaven .
Fry all the fish in the same way , for more details of fish frying , see this recipe .
Now to that oil itself, add the paste , sugar salt, red pepper powder , turmeric powder , coriander powder sauté for 7 mints at high , add chopped tomato sauté for another 2-4 mints .Add 1 cup of water , release the fish slowly to the gravy , and cover .
Cook for 5-7 mints , now take out in a separate vessel and serve with warm cooked rice .

This masaledar or spicy fish curry is going to Maninas at Food Matters for eating with seasons and visit here for more details Eating with season -August


~~~~~~~~~~~~~~~~~~~~~~~~~~~~~~~~~~~~~~~~~~~~~~~~~~~~~~~~~~


Kancha Peper Chutney or Plastic Chutney


I would like to pay my humble homage to Netaji Subhas Chandra Bose on this special occasion of Independance .Subhas Chandra Bose was Born on 23 rd Jan 1897 in Cuttack ,Orissa .He was a very intelligent and benovalent soul . He completed his studies from Cambridge University , and later qualified for the Indian Civil services with flying colors .He realised later that he should offer his services to nation , for which he joined active politics and became part of India's struggle for Freedom.
He was elected president of Indian National Congress Twice , Due to some irreconcilable differences between the Ideology of him and Mahatma Gandhi , he resigned from the post.

Later formed a separate party All India Forward Block to continue the purpose of freedom struggle.
He traveled to many countries, including the then Soviet Union, Japan and Germany.
His association with Japanese Government , resulted in the formation of
INA or Indian National army that Laid the foundation of fight against British Rulers in India , Youths were asked to shed their lives for the noble cause of Freedom.
His motto “Tum Mojhe Khon do , main tumeh azadi Donga , was enough to charge up the spirit of youth .
When the second world war broke , he immediately utilized this war to counter attack the weak British rulers at the centre .With the Japanese aid , he and his armed forces started to battle out the weak allies in Imphal and in Burma.
He is believd to died in a plane crash in 18 Aug 1945 , but there are many controversial instances to counter this incident also .
What ever had happened on that fateful day, he still remains alive in many hearts.
More detailed life history here Subhas Chandra Bose .


Now to my usual recipe , this is a green Papaya Chutney and its called in Bengali Peinper Chutney , I had little reservation before I prepared this, But when I tasted it I got Hooked on to the taste, adding few drops of lemon juice is the trick to make it even more tasty and this make it remain fresh for 3-4 days .
I would like to send it across to Pooja of Creative Ideas for this month of special theme Theme Of the Week .
Under color Green , as this chutney is prepared from green papaya .

Kancha Peper Chutney or Plastic Chutney FOR Theme Of the Week Event At Creative Pooja
Ingredients
½ green papaya cut into small cubes or longitudinal pieces
1 tsp of mustard seeds
1dry red pepper
¾ cup of sugar ( add as per your taste)
pinch of salt
1 tbs of mustard oil
2-3 drops of fresh lemon juice
Method
temper hot mustard oil with seeds , dry red pepper, add green papaya pieces sauté for 1 mints and add salt and sugar , ½ cup of water , cover and cook at low for 10 mints or till the papaya is cooked .Add few drops of lemon juice before you serve. this remains fresh for 3-4 days .Taste better the next day .

Hope you Guys and Girls enjoy this day .


Jai Hind

Monday, February 18, 2008

Payesh and Tomato Chutney

Payesh and Tomato Chutney


This one was taken in while we were in Lancaster US.We were coming from freeway and during a stop to Fill in Gas for the car , We noticed this beauty of the nature .Sunsets are always beautiful anywhere in the world ,Isnt ....
Every Bengali home swears by its Payesh and Tomato chutney ,No Birthday ,Anniversary meal is complete without these being served ,or any other good occasion in the family.Well these also don’t need reasons to make and relish them ,its just that all you need is the desire to indulge in some sweets.(Chalo Kuch Meetha ho jaye or ekto khicho Mishti Hobe )..

Payesh

For payesh recipe
A handful of boiled rice .
Milk ½ liters
Sugar 3 heaped tbs (add more if you think sweetness is required more)
Some Kaju /kishmiss( cashews/raisins)
How To Proceed
Wash the rice properly and soak them in water for 1 hrs in a small bowl. TIP- this makes your payesh cooked evenly .
Now in a heavy bottom pan ,or kadai bring the milk to boil.lower the temperature ,let it simmer and stir the milk sometimes,add in cashews.
Now add rice and let it cook ,after 10-12 mints ,the milk will thicken a bit .
Check if the rice is cooked properly ,take out some of the rice in the spoon and press one of the rice grains to see if they are boiled .If the rice is cooked well ,add the sugar( TIP -sugar should be added at the end when the rice is thoroughly cooked ) and then stir well ,cook for another 5 mints Stop and take out in a bowl .
Cool and serve Payesh .

Tomato chutney

4-5 medium size tomato cut into small pieces
4-5 heaped tbs of sugar
1tsp of salt
Some chunks of aamsotto /aam papri /Mango candies
Little bit of water
How to Proceed
Heat a kadai, add all the ingredients and cover ,cook at low for 8-10 mints till the desired consistency is met .
Well some prefer tempering with mustard seeds ,1 dry red pepper and a dash of fresh grated ginger,You can add them to enhance the flavor more.
Well enjoy Cooking Friends .

Friday, February 16, 2007

Tayparir Chutney or Gooseberry Chutney


I love this fruit since my childhood , my Father will come home from markets with whole bunch of these fruits and in few seconds it used to be all gone .Me ,my brother and my sister would finish it off ASAP...this recipe however I tried making it first time is very much similar with the way we prepare Tomato chutney except I have given Taypaari in this .In addition ,I have also included khejurer Gur /Jaggery and Aamsotto to be little experimental.My father loved it a lot and I do hope you will also.
I got inspiration from Sandeepa'sBlog about this lovely fruit , and since then something I wanted to create out of it ..and here it is ..
these are the raw ingredients for chutney
Taparir Chutney.
Recipe requirements
3-4 cup taypari/Gooseberry chopped in between
Khejurer gur 1 small bowl crushed
Kish-Mish/raisins optional.
Sugar 3-4 tbs
Aamsatoo/Mango Candies some chunks
Method
Clean berries , and cut in between.
Now heat a kadai/saucepan and add oil, add the tayparis fry for 1-2 mints,give salt as per taste ,when the berries start to pop up ,add the sugar , cook for some more 5mints.
Add raisins and cook another 10 mints, until the desired consistency is reached ..
Add Khejurer Gur/Jaggery and stir in between. Breaking the lumps , all to be done at low .
Add aamshoto/mango chunks later in the chutney, take out in a bowl and serve.

This is it friends , do try making it and enjoy .
Happy Cooking ,Bon Apetite.