-->

Tuesday, June 26, 2012

Mach'er Matha Diye Peyanj Kolir Charchori- Spring Onion with Fish Head Stir/Fry


" Joto shukno peyanj kolir fridge-e-sheet e, ami Obelar dal bhaat e phoriye gechi…
Gelas’er jol e, r bhashbo Na...nanaa naa …Amake amar moton thakte dao..."

Wow! My type of song...Talks about cooking – peyanj koli and daal bhaat...Two things/food which I like to eat, hopefully you all. But this song is probably more, more than what it is interpreted by me here. Listen to This Here and close your eyes and mouth for couple of minutes, without passing judgments. The simplicity of lyrics is even more mesmerizing.

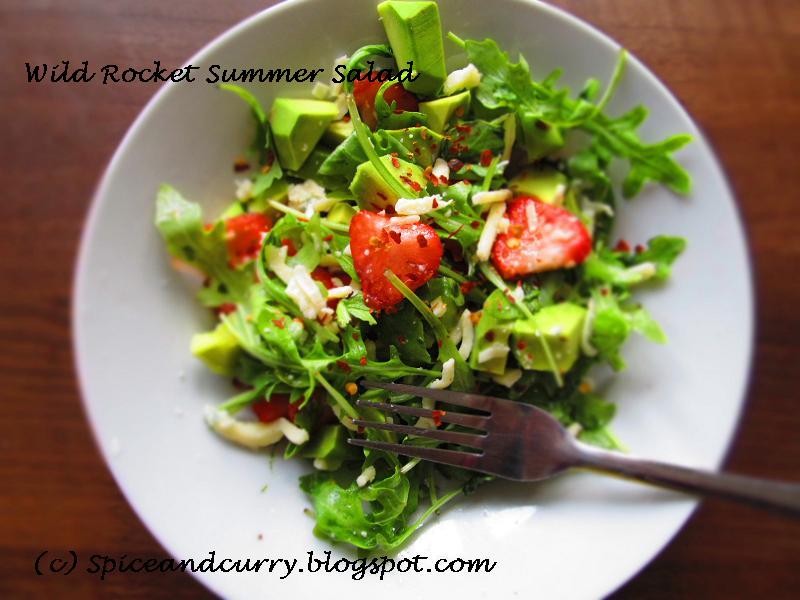
Anyways, now to the cooking part. I have been making peyanj kolir torkari- I mean spring onions with potatoes quite a while now. Sometimes I do add small shrimp or chingri when making it for my in-laws or my parents whenever we visit them back home.(DH is allergic to shrimp so, he skips eating it and that’s the reason you all are not seeing any chingri recipes for quite a while now here).I also like to do a quick stir/fry with brinjal /potato for niramish way of making it, since peyanj koli is itself is amish I don’t know how that would be going to justify a niramish charchari.Any clue readers- peyanj koli is amish or niramish ?

I had some rui fish head and portions from tail end and luckily the spring onions were not that in bad shape as depicted in this song. Usually I do like to use Mach’er kanta/fish bones the big-back bone and macher matha/fish head to make this charchari, so inspired from the mach’er kanta charchari, I did add the fish head, tail portions and made an Amish charchari with spring onions and I wished to use peyanj koli -the stalks but spring onion is what we get here abroad,didn’t use the kanta/bones of fish as I had none. However, if you want to add then go ahead, it will add up to the flavor of this Charchari.


We really liked eating it with warm cooked rice.
Here is how we made it
Mach’er Matha Diye Peyanj Kolir Charchari
Recipe reuirements- (Serves 4 )
 1fish head+ tail portions- rui/ilish/katla etc
About 300 Gms of spring onions or peyanj koli the stalks
1 medium size potato
1 tomato (optional)
2 garlics
1 tsp of grated ginger
For seasoning
1 tsp of kalo jeerey/kalounji/nigella seeds
½ tsp of turmeric powder
1 tsp of red pepper powder
1 tsp of salt
Pinch of sugar
2 tbs of mustard oil + some more to fry fish head
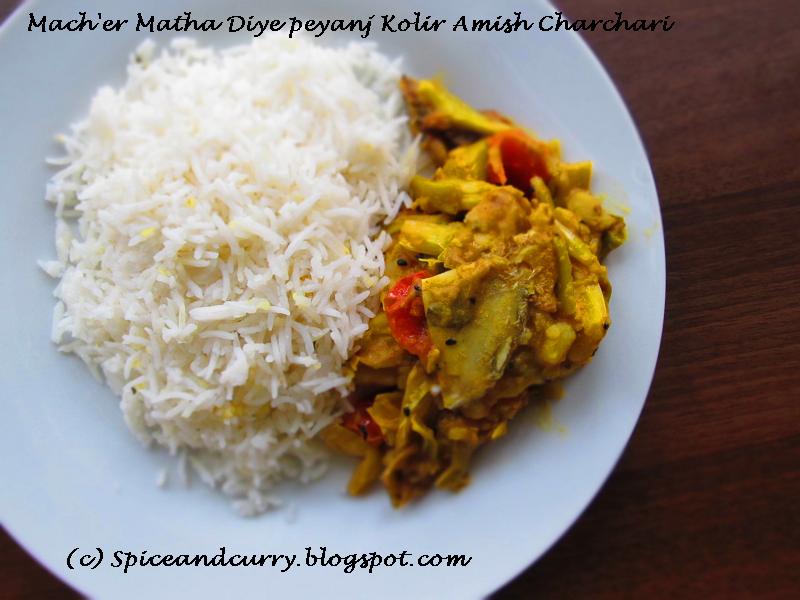


Method
Marinate fish head and tail portion very well in salt+turmeric powder. Keep aside.
Heat up a fry pan/kadai; add about 3-4 tbs of cooking oil .Now fry the fish head very well in oil.
Fry the tail portions also. Take out and keep aside. Do not discard this oil, we will use this oil to make charchari.
Add more oil to it. Now temper it with kalo jeerey/kalounji/nigella seeds. Add in garlic chopped and ginger grated.
Add in potato cubes, fry very well. Add in turmeric powder, red pepper powder, salt and sugar.
Add in chopped spring onions- just remove the portions from root end about 1 cm, do the same from the tip portions. And then chop them in equal lengths of 1 inch.
Add in chopped tomatoes. Mix well. Add in fried fish head and fish tail portions. Break the fish head in small portions. Mix well. Adjust salt or sugar if required. Sprinkle about 2-3 tbs of water- “jol choda deba” so that the gravy doesn’t stick at the base.
Cover it and let it cook, till potatoes are cooked well and can be mashed. If you don’t like to mash potato or the “makho-2” consistency then remove the pan little bit early from the flame.Add a dash of mustard oil at the end.
Enjoy with garam bhaat


Note-
I have added ½ tsp of turmeric powder; if you like you may add more.The turmeric powder brand that I am currently using is at par quality. The colour of charchori will depend on the amount of turmeric powder +red pepper powder used. Please refer the brand of turmeric powder you are using as every brand has different quality of content.
If mustard oil is not available, olive oil or other oil can be used.
Any fish head- rui /ilish/katla/mrigale can be used with this recipe. Ask the fish monger to cut the fish head into 4 portions , this way the fish head can be easily fried even in a not so big wok/kadai or saucepan.

Happy Cooking Friends

Friday, June 22, 2012

A Very Berry Cake


No, don’t judge this cake with the cakes available at pastry shop or by many talented food bloggers who do really make beautiful , breath-taking cakes. This is our, read – mother and daughter’s joint effort. A fun Saturday evening was spent like this. We fought over who will do the cake decorations, and finally we settled on half her way through and half mine.But it all got jumbled up later on, in pursue of utilizing the vacant space.Every vacant space needed some real decorations. And we are no pro – let’s admit it very frankly.Well ok this is our first joint effort in cake decorations.We are then even not amateurs perhaps novice yes.

I had some raspberry and strawberry which I was thinking to use up, other than with yogurt like this   with breakfast cereals. So decided to bake this very very Cake, berry –berry cake – hmm ok... Very Berry Cake instead of.

Somehow decorating a cake with a cone- paper cone, requires quite lot of patience which we both don’t have. And we end up doing this cake in record 15 mints. So, you can see many mingling lines. But again it’s the cake which has its own story. Few days ago when I was putting the ingredients together for this cake I was in a hurry , and so didn't measured the flour or sugar, just went with instinct, looking at the batter I knew I needed  to make two cakes, as I have two small round cake tins. But whatever, I was net surfing then and was reading something interesting and also it was soon going to be dinner time. So, I end up dunking all the batter in one small cake tin pan. While baking the cake, it started overflowing, dropping and spilling over in oven. I didn't mind it, after the baking time I took out the cake, it was baked well, smelled nice but it would have been better if I had gone through making it in two small rounds instead of big one round cake. There wouldn't have been such wastage. So, bottom-line is never mix two things especially cooking and net-surfing.
OK, now if you have Bundt cake pan, it can precisely hold on the amount of batter. Thumb rule is leave about quarter of the cake tin pan and fill only ¾ part or better half part with the cake batter. This is how I have measured the cake batter while baking cakes over these years, but somehow on that day everything just skipped my mind. Anyways we always learn from our mistakes and faults so that we don’t repeat it again. The recipe written down is revised version of that cake, but the pictures are from that spilling cake.The cake was moist and soft and had a very pleasing smell of strawberry.So you know the result , when you try making a berry cake and that too with strawberry.
I am always little skeptical of using colors in baking etc...But sometimes it’s good to let yourself just be free of it . We both – me and DD had a great time decorating this cake.
Here even after done with the cake, somebody is still practicing the art of decorating a cake with a cone.


I think at least somebody will be better than her mother is, in decorating cakes. What say?
Now to the recipe-


Very Berry Cake – Raspberry/Strawberry Cake
Recipe Requirements (measurements are approx)
1 cup of all purpose flour
1 cup of self raising flour
½ cup of cooking oil
1 free range egg
¾ cup of white sugar granulated
1 cup of chopped raspberry
1 cup of chopped strawberry
¾ cup of organic strawberry yogurt
½ tsp of baking soda


Method
Mix in dry ingredients in a mixing bowl- all purpose flour+self raising flour, and baking soda.
Then in a separate bowl, mix in oil and sugar very well.
Add in egg, then followed by strawberry yogurt. Purpose of adding strawberry yogurt is to add the flavor of berries even more. If you don’t have strawberry yogurt, you can make it in home – in about a 1 cup of plain yogurt, add in 5-6 fresh strawberry, adjust sugar and then pulse through in a mixer for half a minute. And again if you don’t like tiny seeds of strawberry...Mash some fully ripened strawberry, pass this over small strainer, and collect the seeds from the strainer. Add this cleaned strawberry paste to the yogurt and mix it with spoon.
Sprinkle some sugar over chopped strawberry and raspberry.Sprinkle some flour as well.
Mix all the ingredients – dry one and wet ones both.Add in chopped berries.
Prepare the cake tin.spray some cooking oil, dust some flour and tap it gently to even out the surface.
Preheat an oven at 175 deg, bake the cake for 35-40 mints or till a toothpick comes out clean when inserted in the middle.
Take out , let it cool, flip the cake and place it over a plate.Now cut into half with a sharp knife , here comes baking two cakes with the batter part.If you go ahead and make two cakes then there is no need to cut into the half along the sides.Just tier it up over the other.However I didn't make two so , here is one cake , cut along sides to half.

Prepare the icing -
About 3/4 cup of cream or Elmea double
3 tbs of icing sugar
few drops of liquid,  food red colour

Mix all very well cream and icing sugar ,till soft peak forms.Reserve some for decorating the cake.Add the colour to the reserved icing and mix well.
Put rest of the icing over the half  portion, place the other half , then put the icing again top over it.Let it chill for couple of hours in fridge.Take out once it's set.
Make a paper cone with a grease proof paper or may use a transparent plastic, seal the end with tape.Fill in with coloured icing , then cut a small opening at the tip .Start working with the cone and decorate the cake.


Note-
This cake is made with more strawberry than raspberry; however there is no hard and fast rule of adding fruits to the cake. You may use other berries as well.

Happy Cooking and Have a nice weekend...

Tuesday, June 19, 2012

Wild Rocket Avocado and Strawberry Summer Salad


There are days I really do feel, works should get finish before it starts. Mornings are always and have been a roller-coaster ride for me. Packing up DH’s lunch box and sometimes DD’s lunch box, although these days she insists on having school dinners. Whatever be the choices I still have plenty of reasons to feel breathless sometimes. After dropping DD to her school, I generally like to pick grocery on the way back home, to an empty home. I then chalk out what are the pending jobs that need utmost attention. On that priority list tiding up is always on top slot, especially DD’s room. On holidays, it would be a different story although; she would help me out cleaning and tiding her room but in bargain of watching her “Power Ranger” series.

But in these moments of quietness, generally I don’t like much to cook after all those whirlwind morning round of cooking, packing the lunch-box and then preparing the breakfast. Those are the times, I generally like to fix meals which are quick and yet healthy. This wild rocket summer salad has been on my list since the first day I tried making it. And over the time it has seen many changes, much substitution etc etc...But the freshness it gives is still boundless.
A very light dressing of olive oil, salt and dry red chilly flakes and pinch of sugar works fine for me. However if you like slight variation then red wine vinegar or lemon juice can also be included. And the name has already suggested you the main ingredients

Now to the simple recipe for summer salad


Wild Rocket Avocado Strawberry Summer Salad
Recipe requirements
About 2 cups of wild rocket
4-5 fresh strawberries chopped
1 avocado chopped
some shredded cheese
For the dressing
1 tbs of olive oil
¼ tsp of salt
Pinch of sugar or 1 tsp of honey
¼ tsp of crushed red chilly flakes
Method
Clean the wild rocket leaves very well in water. Wild rocket has a very unique and peppery taste.
Chop strawberries, sprinkle some sugar over it. Keep aside. Cut avocado in to half, take out the stone from the middle. Now chop the avocado in to bite size pieces.
Prepare the salad dressing
In a mixing bowl- mix olive oil, salt, sugar and red chilly flakes. If you like slight sourness, then may add lemon juice as well.
Now toss all the ingredients wild rocket leaves, avocado, strawberry and the dressing well. If you like then you may keep it chilled for couple of hours and serve as cold salad as well. Or just go ahead and relish.


Note-
This makes a great accompaniment to Chicken Tikka or barbecued meat.
Cherry tomato can also be included or some toasted cashew nuts as well.
Parmesan cheese or any other cheese does give some more flavors to it.
Sometimes I do also add cooked couscous to make it even more filling.

And in one corner of our home, a small herb patch is growing.I owe it to you Jo for motivating me to plant some herbs as beginning.


Happy Cooking Friends

Friday, June 15, 2012

Curly Kale Leaves and Vegetables 'er Chorchori


I was in an analyzing mood couple of days ago. You would say lo behold again her ramblings will start. But tell me what a food blog is if there is no story to tell you that go with the making of food and the people that are associated with eating that food. Otherwise there are many and probably thousand recipe sites where you can simply go and take or print the recipe and start cooking. There is no bonding between the author and the reader.


Some where down I read that reading is a generosity pact between a reader and an author. I may not give you payments to read this page or you may not pay me for this recipe when you use it someday. But it’s the generosity from both our ends which is so visible here and this generosity somewhere binds us unknowingly. How beautiful that thought is?

It doesn’t strike very prominently that somebody at far corner of the world is reading this post probably at odd hours when I might be sleeping or doing some different work, but still the bonding is there. Even in our day-today life generosity always bounces back to us just like positive Karma brings positive vibrations to us also.
Or probably God keeps an account where he does all the calculations of our day-today dealings and what returns should be given back to us in being meeting and mixing with noble hearted and generous people. But this is our responsibility also not to take others generosity as their signs of weakness or timidity. And it’s also important to realize that manipulations and generosity don’t go hand in hand. We can be generous without any obligations but bowing down to manipulations should not be considered as being generous.
Anyways, but ours is noble pact of generosity, isn’t, so, thank you for being part of our journey and being generous to me.
Now to the recipe part after all these “Gyan.”

Shorshe bata/ mustard paste is perhaps or can be termed as “lifeline” to Bengali food, charchari, mach’er jhaal , Shukto and labra. And this is no exaggeration on my part .If you want to spice up little bit more, add shorshe bata to any gravy,,Shukto, torkari, fish gravy or even mangsho , it imparts lovely flavor to it.
In a foreign land I came across these curly Kale leaves which are very nutritious. I had some reservations using Kale leaves earlier, but when I started to use them in stir/fry or in charchari , I was pleasantly surprised to find that it magnificently blends with Indian spice or probably the flavors gets enhanced when it is used with Indian spices.

This charchari is now part of our Sunday meal quite often. As Bengali food’s first courses always is a shaag preparation or starts with some bitter. This Curly Kale Charchari is a great way of introducing vegetables and healthy green leaves even to picky eaters like my dear daughter. Give it a try someday, a whole new flavors is waiting to be discovered for you.


Shorshe Bata diye Curley Kale leaves ‘er Chorchori 
Recipe requirements (measurements are apporx)
Curly kale leaves prepared and chopped- approx 200 Gms
About 2 cups of cauliflower florets, tender stalks  and tender leaves
10-15 red small radishes or half white radish, whatever available
Half brinjal / aubergine
Half plantain or green banana
1 medium size potato
half tomato


Seasonings
For the shorshe Bata/paste
3 heaped tsp of black mustard seeds/yellow mustard seeds
1 tsp of poppy seeds
2 green chilies
Little bit of salt+mustard oil and few tsp of water
Soak mustard seeds and poppy seeds in water. Then grind them into a smooth paste with mustard oil and salt in whatever medium you have-sheel/nora or coffee grinder or food processor.TIP- If using food processor increase the amount of mustard seeds+poppy seeds to rotate the blades and make the paste evenly. Store the left-over shorshe bata/paste in fridge –stays fresh for 3-5 days. And use as it is required in other fish gravy or vegetables stir/fry or shukto.
There is a home-made mustard powder recipe-  Here and shorshe bata with mangetout recipe is there also


For the stir/fry or  Charchori
½ tsp of turmeric powder
1 tsp of red pepper powder
1 tsp of salt or as per taste
1 tsp of sugar
3-4 tbs of mustard oil

Method
Let’s start with short-cut and energy saving method
Heat up a pressure cooker, add mustard oil, and temper it with panch phoron mix. Let it splutter.
Add all the chopped vegetables – cauliflower, radish, and brinjal, plantain,( in Charchari thumb rule is every participating vegetable should be cut evenly and in long pieces of about roughly 2 inch.)
Now fry the vegetables for 6-8 mints at med-high flame- season it with turmeric powder, red pepper powder and salt+sugar.
Add in about quarter cup of water. Cover the lid and cook for only one whistle. Open it immediately. TIP- To reduce the pressure, run cold tap water over pressure cooker, pressure subsides quickly, making the pressure cooker lid to open fast.
Now add in prepared shorshe bata/paste to it, again put that over flame. Keep mixing it very well. If you wish you may add mustard oil at this stage to give nice mustardy smell to the recipe.
Serve warm with rice.

Long process
After cleaning and cutting curly kale leaves- blanch them in a saucepan- just put the saucepan with chopped curly kale leaves over medium flame, cover it and let cook for 3-4 mints or the leaves shrinks releasing the water. TIP- Do not discard this water, save it to use it up later in making the charchari.This water is contain the essential nutrients that comes out after blanching curly kale leaves.
Now put another saucepan/kadai over flame, when properly heated add in mustard oil, temper it with panch phoron.let it splutter properly.
Add in potatoes, cauliflower, radish, plantain, brinjal to it and fry them 6-8 mints or till they becomes slightly soft.
Now add in curly kale leaves which should be finely chopped. Adjust the seasonings- red pepper powder, turmeric, salt and sugar.
Cover the saucepan or kadai and put the flame to low. Let it cook very slowly at low. Use the left-over water that came out after blanching the curly kale leaves.
When the vegetable are nearly cooked, add the shorshe bata/paste to it, give a good stir and mix well. The texture should be- makho-makho.
Take out in a serving bowl and enjoy with rice.
Note-
I also use red small radish whenever I don't get white radish here.
Curly kale leaves are highly nutritious leaves- it would be better to chop them finely. These days it’s available in reasonably priced and chopped in big packets.
Many do not add posto or poppy seeds paste for preparing shorshe bata.I too often follow that rule but this time I added poppy seeds to mustard paste as well. Generally add poppy seeds as this gives nice texture and also don’t end up in being bitter.
Shroshe bata should never be over cooked as they may turn the gravy/chorchori  bitter, so it’s always good to add them when the vegetables are nearly cooked or probably at the end stage of any recipe, this tip has never failed me so far.

Other recipe from this blog  about chorchori-

Beet Shaak'er Chorchori
Lao Shaak'er Chorchori
Notey Shaak'er Chorchori
Puin Shaak'er Chorchori

Recipes around the net
Chorchori at Kichu Khon
Panch Mishali Chorchori - Cooking in Westchester
Preoccupied's Aloo Chorchori with memories
A detailed post by Bongmom on Charchori
And at Ahaar - Cleaning the fridge with a Labra recipe
Mulo Shaak'er charchari at Homemaker's diary

Happy Cooking and Have a Nice Weekend Friends....

Monday, June 11, 2012

Banana Wheatgerm Bread- Breakfast Made Easy


Hola! How was your weekend? I am sure plenty of things to do or to make you busy, pampered and loved. But why pampered, I would say it’s your right to indulge in sometimes happiness that surround you in terms of the laughter of the loved one, pranks innocently thrown at you which catch you sort of unaware. 

Mischievous, innocent planning and conversations with your kids which makes you stop and ponder for a while, thoughts that whiz pass effortlessly. Moments spent in day-dreaming, realizing there are definitely other arenas still unexplored. Life gives us many such opportunities effortlessly, but we on other hands tend to always ignore and pass on doing things which are just so part of our daily grind. Take a moment away from this busy schedule, steal one golden moment from this nitty-gritty of complex life, smile for a moment, thank God for the love and blessing it has showered on you, look around, see and feel the warmth of sunshine, smell the sweetness of new and flourishing blossom around you, and of course love of your loved one. Life is all that, all that we can make out of it and depends on how we will mould, bend, stitch, sew and cut it to be just like a tailor stitches the clothes without wasting it. You are the tailor of your own life, and I am sure the end product will definitely going to be all worth the effort you will be putting on it from now on wards. So bring it on.
This bread recipe is super easy to make, no rocket science or need to calculate escape velocity or torque. Whatever...


I had some ripened bananas, which were in dire need to use up otherwise they would end up in bin; personally any waste of food to me is just like a sin. And here comes “count the blessing part”. I also had some wheat germ which I have been using in making breads for a while now. I spiced it up with little bit of cinnamon and nutmeg powder. A healthy alternate to shortenings or butter is cooking oil that also goes into making this bread.
To the recipe part now


Breakfast Banana Wheat Germ Bread
Recipe Requirements
2 cups of all purpose flour or 1 cup of all purpose flour + 1 cup of whole wheat powder (Atta)
1 cup of wheat germ
3 ripened bananas
½ tsp of baking powder
½ tsp of baking soda
½ tsp of cinnamon powder
½ tsp of nutmeg powder
1 large free range egg
1 cup of plain yogurt
½ cup of sugar
½ + 2 tbs of corn oil

Method
Mash bananas with fork evenly.
In a separate mixing bowl. Mix in all purpose flour with wheat germ. If you are using whole wheat flour then mix it as well.
Add in baking soda and baking powder. Add in cinnamon powder + nutmeg powder. Leave aside.
In a big mixing bowl, take the mashed bananas.
Add in corn oil and one egg. Mix well.
Now add in yogurt about two tbs at a time mixing thro.Use the entire yogurt content. It would be great if you can take the yogurt out from fridge about 10-15 mints prior of mixing it with the batter. This would help in even mixing.
Now use the flour mixture half a cup at a time mixing very well through. Use the entire content.
Prepare the oven and preheat at 175 deg C.
Grease a loaf pan, sprinkle some flour and tap it gently to even the flour all over the loaf pan.
Add in the prepared bread batter and transfer this to the middle rack in the oven.
Bake for 50-55 mints or the outer part has turned brownish or golden. Check inserting a toothpick, if it comes out all clean when inserted in the middle part of loaf, the bread is ready.


( Weekend  Breakfast- Fried egg, Banana Wheat germ bread, Chocolate muffins and honey dew melon pieces.)

Note- 
The texture of bread is more like a cake –soft and spongy. This batter recipe is very flexible; you can even make cupcakes with it. Just reduce the time for baking to about 20-25 mints or bake until a toothpick comes out clean when inserted in the middle.You can find the Chocolate cupcake recipe Here.
Please refer your oven manufacturer manuals as this is just a rough guide to make cupcakes and bread which suited in my oven here.

Happy Cooking Friends